
Weeks 1 - 2
Illustration In Response To Written Words - Conceptual Illustration
For the first project of this semester, we were tasked with producing conceptual illustrations for a particular article. I was given the BBC article 'Working from Bed: 'I don't even have to get dressed.'' This article was about how people have adapted over the pandemic, opting to work from the safety of their own bed as opposed to a work space.
When it comes to the type of illustrations we had to create, they were to be less literal, and more complex; needing some problem solving to be able to understand the idea. The specific requirements that I was given for my illustrations were one 160 x 120 mm illustration, and one 50 x 70 mm spot illustration, both in CMYK.
When it comes to the type of illustrations we had to create, they were to be less literal, and more complex; needing some problem solving to be able to understand the idea. The specific requirements that I was given for my illustrations were one 160 x 120 mm illustration, and one 50 x 70 mm spot illustration, both in CMYK.
Artist Research
|
|
To begin with, I looked at a variety of different conceptual illustrators, to understand the types of ideas that were being generated, but more importantly; the way in which they use colour to communicate. The majority of examples I found were vibrant in colours, to catch the readers eye when they are scrolling/flicking pages and make them intrigued to read the article. I also found that the majority of conceptual illustrations are simple in style; to convey the idea simply, and to save time given the short time span artist have to create them.
When looking at spot illustrations, it became apparent that working with a simpler style was key to ensure that what the image was conveying wasn't lost. Similarly, vibrant colours makes the image easier to read, but simple enough to not be over complicated. Generally, the ideas in the spot illustrations aren't as complex as the main illustration, but still relate to it in some way.
|
When it came to dissecting my own article, I began by making notes and quick sketches of rough ideas. This was helpful in understanding what the article was about, and also who it would be targeted towards. It also helped me get so initial ideas down, to and allowed me to begin brainstorming different ideas relating to different parts of the article.
*scan in pages
*scan in pages

|

|

|
Main illustration - 160 x 120 mm
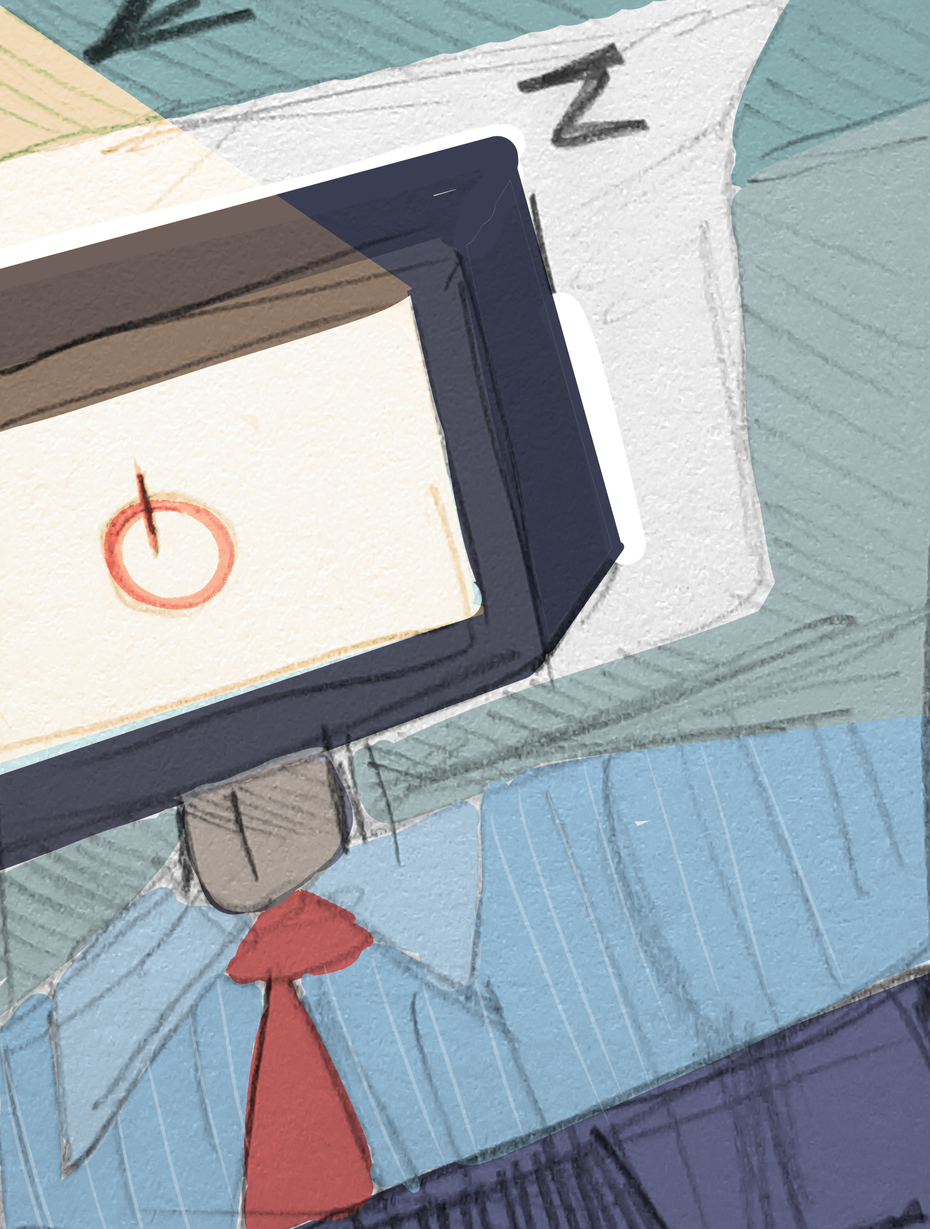
Once I had developed my thumbnails and began to refine and decide on the idea I wanted to go for, I scanned the image in to Clip Studio and began to apply colour. My idea for this main illustration was to show the more positive side to working from bed over lockdown; it being a lot comfier and homely than working at a desk. I decided to go for a cool colour palette overall to convey the idea of 'sleep' colours; very muted and cool as opposed to vibrant and warm. This worked well overall as would allow me to overlay different layer properties to give the laptop screen some light.
I was however undecided on what colour to chose for the girl's pyjamas as I didn't want the colour of the clothing to blend in too much with the background, but it became apparent that a warmer colour stood out too much an distracted from the piece as a whole. I ended up preferring the top two, and would stick with a cooler colour when developing the final batch of outcomes.


|


|
Spot Illustration - 50 x 70 mm
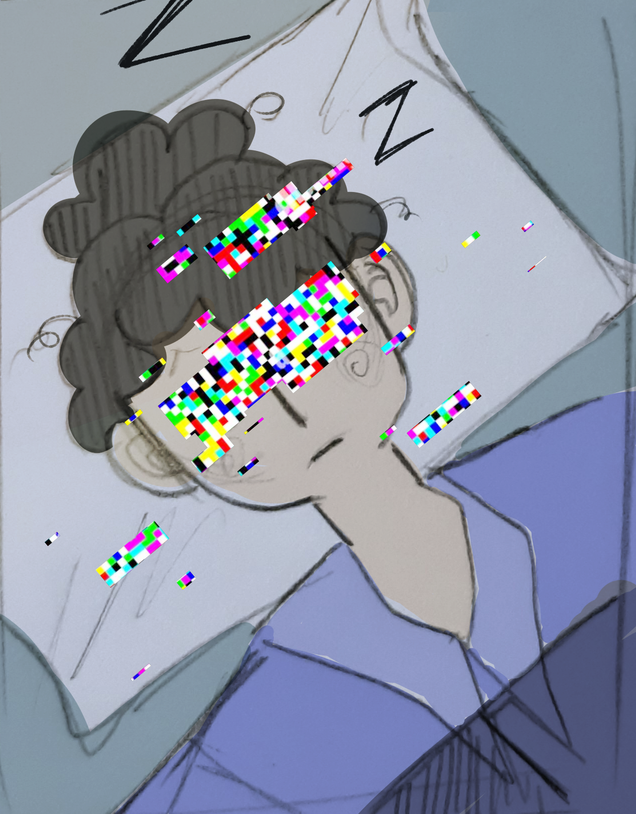
For my spot illustration, I decided to illustrate another part of the article, focusing on the negative relationship between work and sleep that can be developed from working from bed. Like my main illustration, I wanted the main colour palette to be muted, but be able to work some warmer colours in, especially for conveying the idea of the laptop always being turned on, even in sleep.
From my initial thumbnail that I scanned in, I decided to turn the face to the other side, to make the most of the diagonal light shining over to the right as to not waste the empty space, and to make the composition more balanced.
|

|

|
Feedback
Following the feedback session before hand-in, one of the pointers I got given was about my Spot Illustration, and how different it was in comparison to the main illustration. The suggestion was to include the same figure that had been present within the main illustration. The idea of including pixels and other things associated with laptops and computers was brought up.
I began by sketching out some rough thumbnails before moving onto developing them digitally with effects. But translating the idea I had on paper to a concept was difficult and I didn't like the first few ideas as it didn't look right and the pixilated part of the piece seems far too separate from the main illustration.
I began by sketching out some rough thumbnails before moving onto developing them digitally with effects. But translating the idea I had on paper to a concept was difficult and I didn't like the first few ideas as it didn't look right and the pixilated part of the piece seems far too separate from the main illustration.

|

|

|
|

|

|
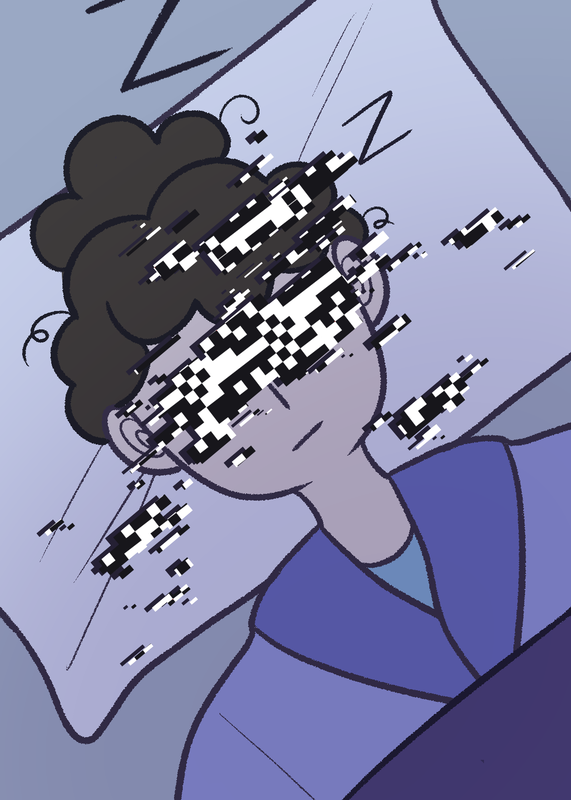
To make things a little easier and clearer to work with, I cleaned up the linework from my rough sketch, and worked out what glitch effect I wanted as I was happy with the idea overall, but was struggling with the execution. I quickly decided that I didn't like the use of static squares; both colour and black and white as it was too confusing to look at. Instead, keeping things simple whilst conveying the poor relationship between using technology in bed was what would work best. I prefer the final two outcomes far much more than the others, as it looks more coherent and less loud.

|

|
|

|

|

|
The feedback I got given for my main illustration was mainly focused on the background. The mug was difficult to read in the background, and so I decided to get rid of it altogether, and opt for something more relevant to the laptop. I decided to go with a charging port as the fire would allow me to make the most of the space on the left hand side.
Once I was happy with the placement of things, I lined the illustration with a textured brush just to avoid it looking too flat. Overall, I preferred this layout more than the old layout, as it added more to the illustration and balanced it out better.
Once I was happy with the placement of things, I lined the illustration with a textured brush just to avoid it looking too flat. Overall, I preferred this layout more than the old layout, as it added more to the illustration and balanced it out better.

|

|

|
I decided to keep the same colour scheme as my thumbnails as I believe this was something that worked well to communicate the relationship between work and sleep, whilst making it seem like a comfy place to work from.
I added some basic shading to give the objects some depth. This helped significantly, especially with things such as the wire in the background. For the keyboard, I made it separately so I could put all the keys on, and then could warp it around the shape of the blanket later on. This was a lot more difficult than I thought it would be, as I had to do each row individually whilst making sure they still lined up. |


Final outcomes
Overall I was fairly happy with the outcomes. And I was happier once I converted files finally into CMYK as the colours were far more vibrant than the original outcomes. I did need to tweak some of the colours, but overall, kept them the same - just in a different format. I especially like how the light from laptop screen looks in the final piece, adding that final touch. I was also a lot happier with my final spot illustration, as comparing it to my initial plans, it is significantly stronger of an outcome.


|

|

